Septic Tanks and Conventional Onsite Wastewater Systems
A conventional septic system consists of a primary treatment, or “septic” tank, followed by a subsurface gravity-fed effluent dispersal bed or trench(es).
The function of the septic tank is to settle out solids, and float oils and greases in the waste stream. This is referred to as “primary treatment”. For a conventional onsite wastewater system, effluent, or wastewater flow exiting from the septic tank drains by gravity in either trenches or beds through a subsurface piping network.
Soils can naturally provide a very high level of treatment to domestic wastewaters. However, before effluent drains or is distributed with a pump into a soil dispersal network of pipes, it’s important that enough primary treatment occurs so that solids and oils/greases are removed and don’t clog the distribution piping, thereby causing it to back up or overflow.
Septic Tanks
Below is an illustration of a properly sized and constructed septic tank, along with some key points about various critical features.
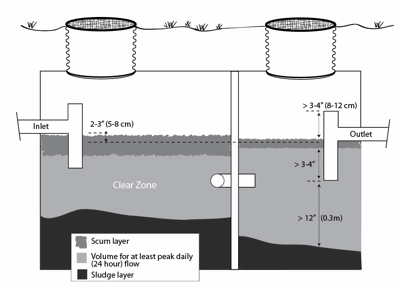
Figure 1. Basic septic tank features and functions.
From: Planning and Installing Sustainable Onsite Wastewater Systems, S.M. Parten, McGraw-Hill, 2009.
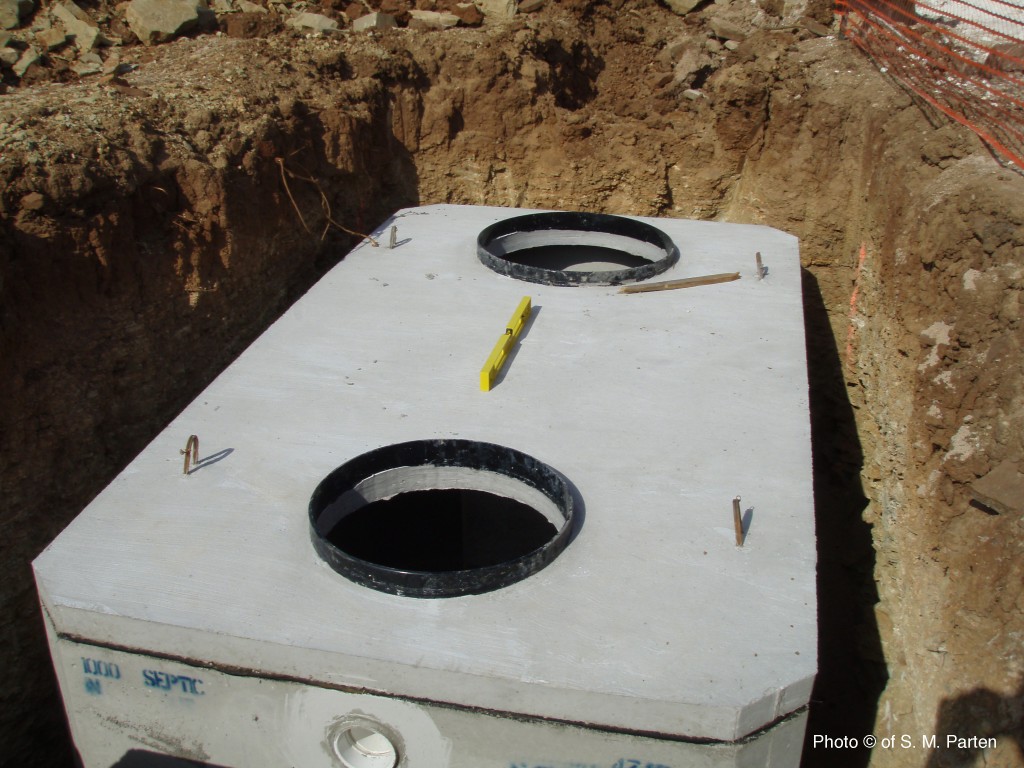
Figure 2. Precast concrete tank, installed level
When delivered to the site, the tank is lifted with chains placed around the tank, and inserted into wedge insets on the corners.
For sites where it’s not possible to drive large trucks needed to deliver concrete tanks or pour and place concrete for cast-in-place tanks, fiberglass (FRP) tanks of all sizes can be used. For smaller systems, polyethylene tanks up to about 1,500 gallons capacity can also be used.
FRP and polyethylene tanks will be discussed later on this website.
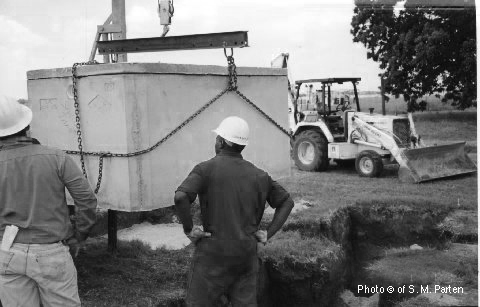
Figure 3. Precast concrete tank being delivered to a site and placed in the hole.
From: Planning and Installing Sustainable Onsite Wastewater Systems, S.M. Parten, McGraw-Hill, 2009.
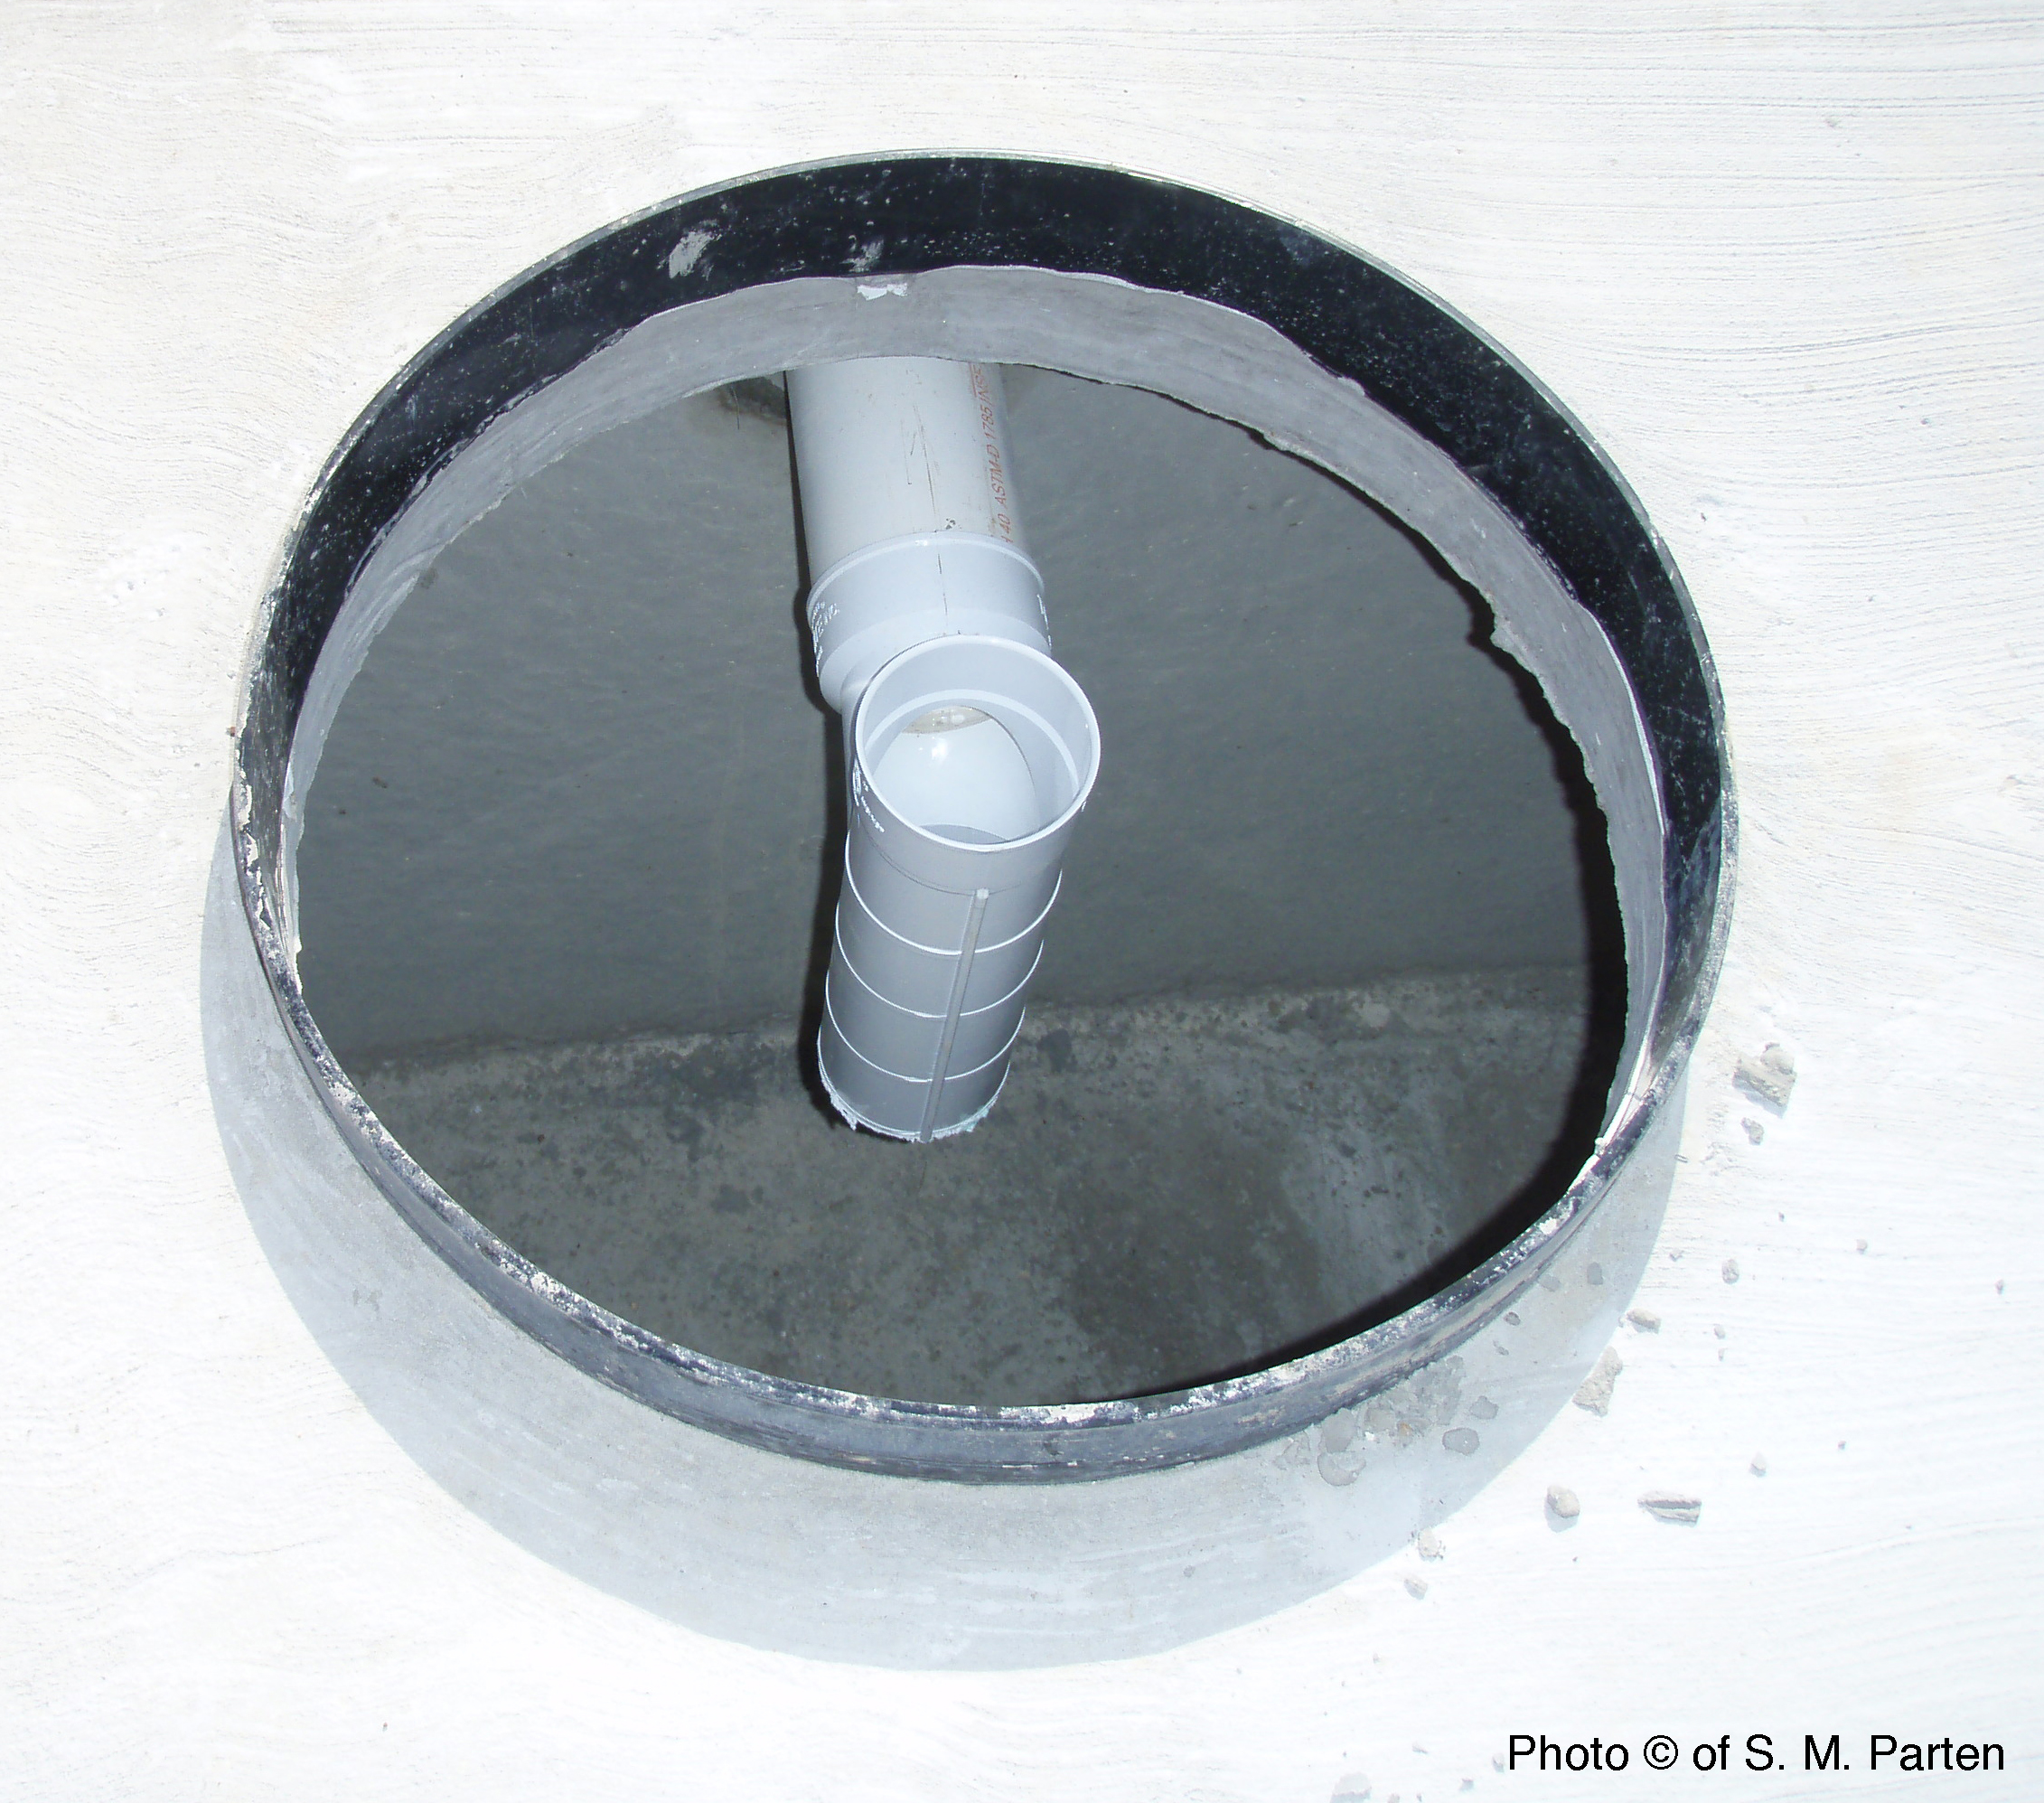 This photo shows the tank’s outlet “tee”, where primary treated effluent exits the tank. Tees are also located at the tank’s inlet, to minimize disturbance to the settling solids and grease when wastewater enters the tank. The outlet “tee” is critical to the
proper functioning of a septic tank. As illustrated in Figure 1, the bottom/opening of the “tee” is located in the “clear zone”, away from either sludge at the bottom of the tank or floating scum at the surface of the liquid. The “tee” prevents solids and grease from entering and clogging the dispersal field lines.
Notice also the riser adapter ring cast into the concrete tank lid. The access riser reaching from the top of the tank to the ground surface is adhered with a suitable adhesive to the black ABS plastic adapter ring to create a watertight connection between the tank and the access riser lid. A bolt-down gasketed lid is then secured to the top of the riser at the ground surface, so that sludge/ scum levels and the integrity of the “tee’s” can be periodically checked in the tank, and cleaning/servicing performed as needed.
Figure 4. Schedule 40 PVC “Tee” fitting used for all tank inlets and outlets (regardless of materials of construction used for
the tank).
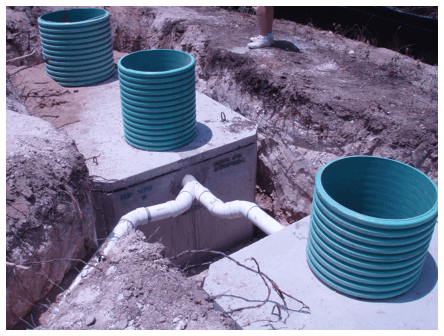 Figure 5. Concrete tanks with durable PVC risers in place, and adhered to the black ABS rings with suitable adhesive to make a watertight connection between the tank and the riser.
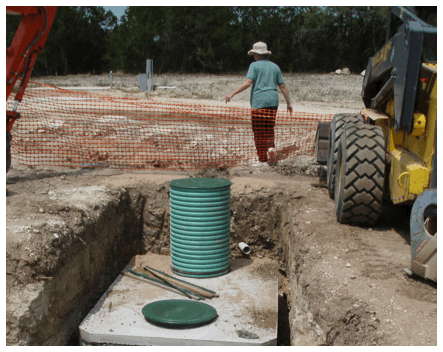
The two tanks shown in Figure 5 are part of a larger system
serving a public park. The tank on the bottom right is one of two septic tanks, with another located elsewhere on the property serving another building. The concrete tank at the top of the picture is a field dosing tank, in which a pump “station” is located for dosing a nearby subsurface effluent dispersal field (that type of system will be discussed later on the website). Septic tank effluent from the remote building enters the pump tank via the Sch. 40 PVC piping on the left of the photo, and combines with septic tank effluent from this septic tank (bottom right in photo).
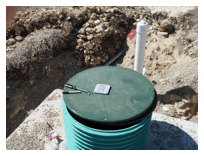 Figure 6. Bolt-down, gasketed watertight fiberglass lids are affixed to the top of the blue PVC risers with threaded connections. This type of lid not only keeps extraneous water from entering the system, and odors/gases from exiting, but makes for much better access to the tank for making routine checks and servicing as compared with heavy concrete covers (which aren’t watertight).
Figure 7. One of the two access risers is in place on this tank (the other fiberglass lid is just laid over the access hole to prevent dirt/debris AND PERSONS from falling into the tank).
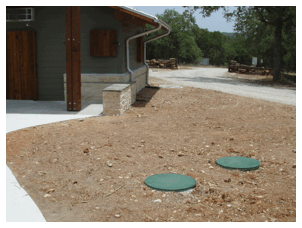
This photo shows the tank access riser lids (just above final natural grade) after final cover is in place. Once grass and vegetative cover are established here, the green fiberglass lids over the tanks will hardly be visible, yet they will make possible easy access to the tank for checks and periodic cleaning/pumping.
These lids are built for fairly heavy loading (small to mid-sized mowers, though not regular vehicular traffic). Traffic bearing lids can be specified for heavier loads.
Figure 8. Septic tanks with watertight access risers and lids, after final cover is placed.
Image from: Planning and Installing Sustainable Onsite
Wastewater Systems, S.M. Parten, McGraw-Hill, 2009.
Below are some key things for property owners and designers
to keep in mind when purchasing or specifying a tank to serve a new system, or where a tank needs to be replaced:
Sufficient volume in the tank where settling can occur for incoming suspended solids, and flotation of fats/oils/greases (FOG)
Multiple compartments, or multiple tanks in series
[Figure 1 shows this —- This helps prevent solids from settling in the direction of the inlet to the second compartment. Larger tanks and fiberglass tanks often use baffles with two to three 3-4 in. (80-100 mm) diameter holes placed at intervals across the baffle at a depth of the approximate middle of the clear zone.]
Water-tightness of the tank
Structural integrity
Inlet tee in place
Outlet tee in place
Sufficient length to width ratio for the tank
First compartment has at least 50%, and preferably more, of the total tank capacity; For multiple tanks, it is recommended that the first tank be at least somewhat larger than the second tank
Adequate depth of tank for settling and sludge/scum build-up
[For further information on all of these elements, see
Chapter 5 of Planning and Installing Sustainable Onsite Wastewater Systems, S.M. Parten].

